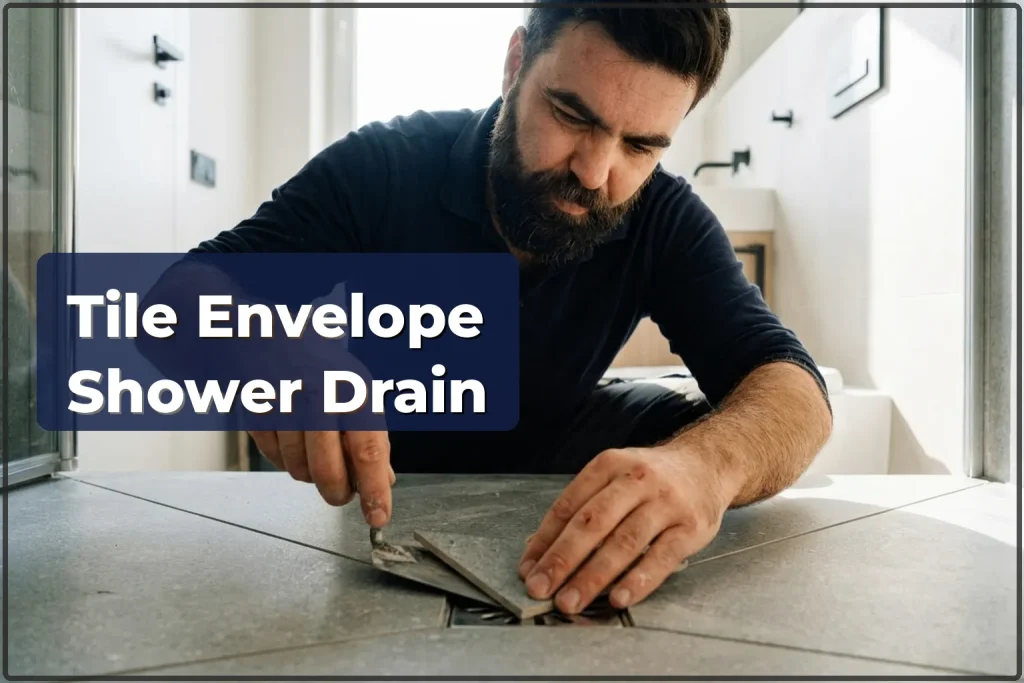
An envelope is a way of laying tiles on a shower floor where four triangular sections create a fall toward a central point drain. Water runs in from every side to the drain without standing on the surface. This is not just “laying tiles on a slant” — it calls for exact slope calculation, clean angled cuts, and proper waterproofing. If you are making a walk-in shower in a flat in Mokotow or Zoliborz — a tile envelope is the best drainage option.
How much does a tile envelope cost and what affects the price
The cost depends on the size of the shower area, the tile you choose, and how difficult the cuts are. Mesh-backed mosaic is the easiest option because the small pieces follow the fall without trouble. Standard 30×30 or 60×60 tiles need careful cutting of every triangle. Large format (60×120) and sintered stone are the hardest — you have to keep the number of joints low while still holding the slope. A Viega or Geberit drain, Mapei or Ceresit waterproofing — all this changes the final price. Fasteners and standard consumables are included in the labour cost. See the current prices in the table.
| Service | min | max |
|---|---|---|
| Drain slope — standard tile | 250 zł/шт | 400 zł/шт |
| Drain slope — large format | 350 zł/шт | 550 zł/шт |
| Drain slope — mosaic | 300 zł/шт | 450 zł/шт |
| Drain slope — sintered stone | 450 zł/шт | 700 zł/шт |
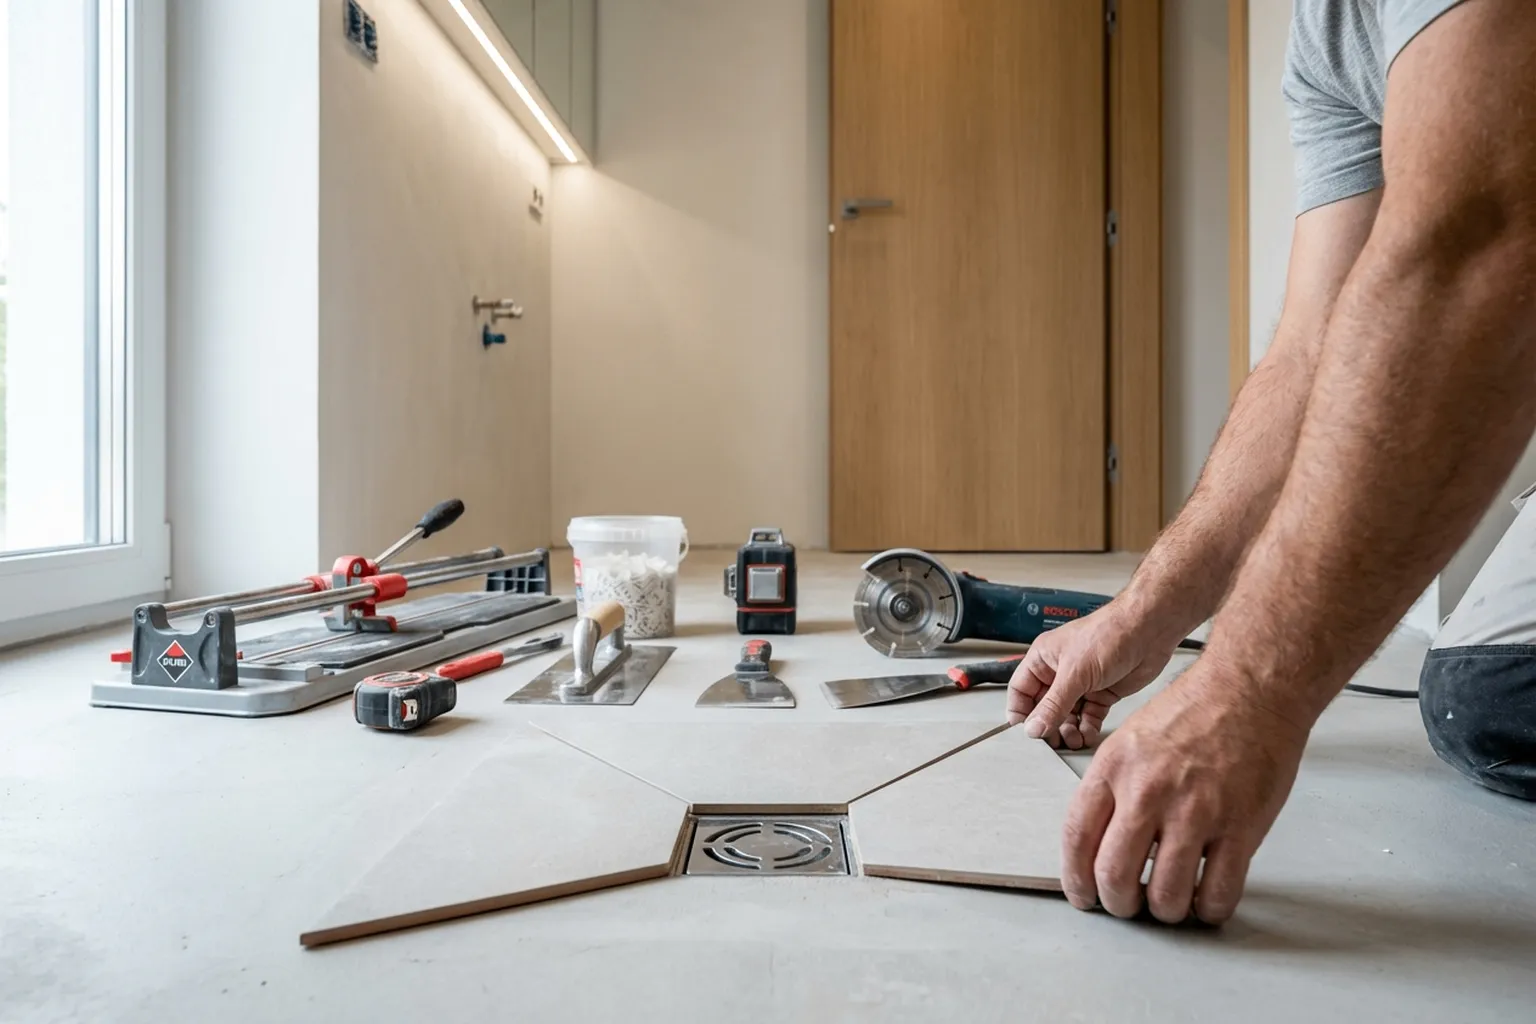
How envelope installation works on site
- The specialist inspects the substrate — the screed has to be even and free of cracks. If there are dips or high spots, we level it with a self-levelling compound.
- Installs the point drain (Viega, Geberit) at the planned level. The drain height sets the screed thickness and the amount of fall — 1-2% (1-2 cm per metre).
- Builds the base slope from cement-sand mix or a ready-made compound. Four planes come together at the drain, creating the “envelope”. Each face is checked with a spirit level and straightedge.
- Applies waterproofing — liquid membrane (Mapei Mapelastic, Ceresit CR 166) in two coats with reinforcing tape at wall-floor junctions. The drain area is handled separately with a collar.
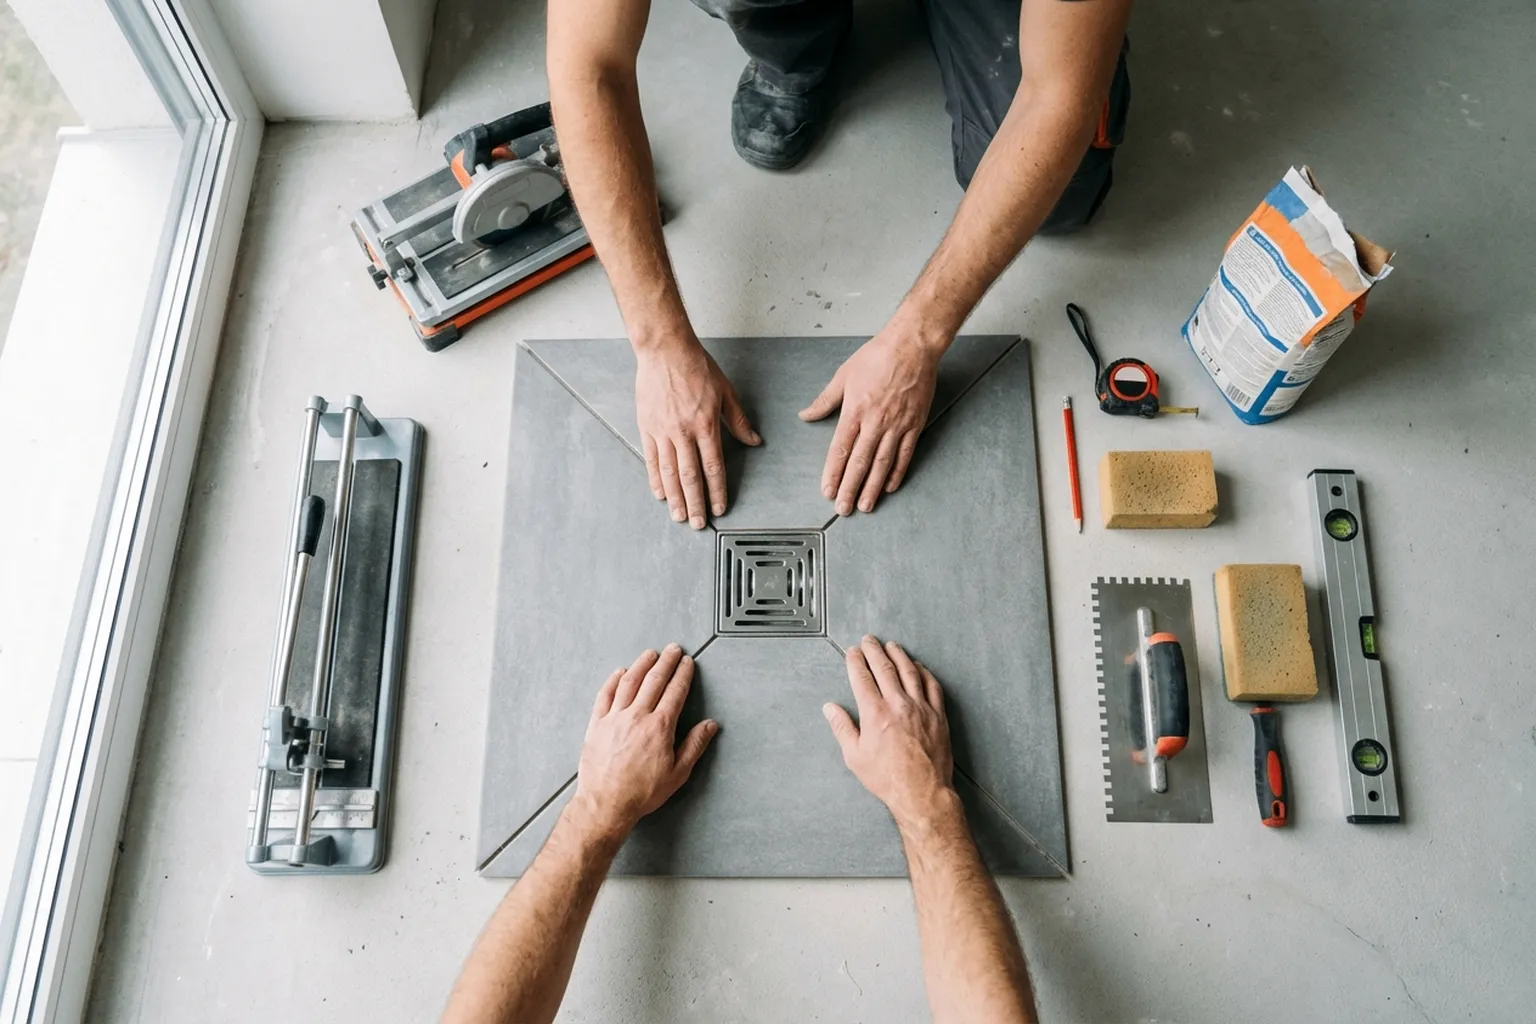
- Marks the tile layout. The cut lines go from the shower corners to the centre of the drain — these are the envelope diagonals. Tiles are cut on an angle along these lines.
- Lays the tiles on adhesive, working from the drain out toward the walls. Each section is installed separately with constant slope control. Joints where the triangles meet must stay even.
- Grouts the joints with epoxy or cement grout (Mapei Kerapoxy, Ceresit CE 40). In wet zones, epoxy grout is the safer choice — it does not take in water or go dark.
Common mistakes when building an envelope (and how to avoid them)
- Too little slope — water sits around the drain. Minimum 1% (1 cm per metre), best 1.5-2%. Check with water before tiling.
- Wrong drain height — if the drain sits too high, the slope becomes too steep and the tiles lie unevenly. If it is too low, you will need a thicker screed.
- Skipping waterproofing or putting on only one coat — a leak to the neighbours below will cost more than the whole renovation. Two coats of liquid membrane waterproofing are required.
- Using large-format tiles without envelope laying experience — where the four planes meet, “teeth” (edge misalignment) appear. For a first attempt, mosaic or tiles up to 30×30 are a better choice.
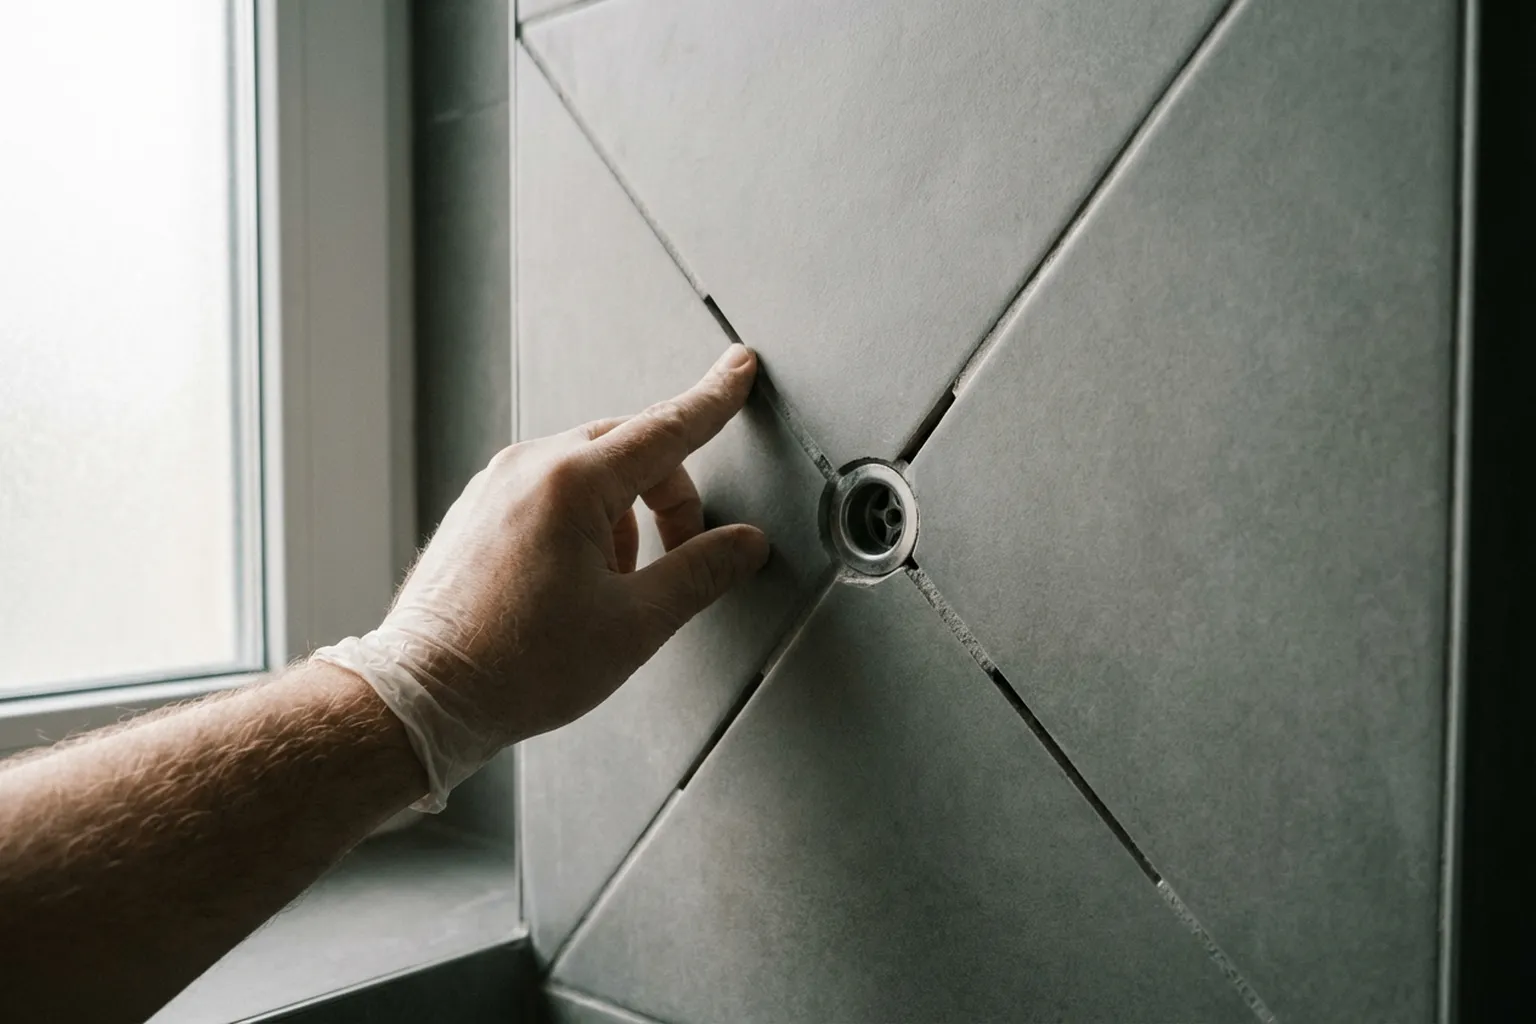
- Untidy cuts at the triangle meeting lines — joints spread apart, wedges show up. Every cut has to be marked on site, not guessed by eye.
- Laying with standard adhesive instead of flexible in the wet zone — tiles start coming loose within a year. In a shower, use C2TE adhesive (Mapei Keraflex, Ceresit CM 17).
- Forgetting the threshold at the entrance to the shower zone — water runs into the room. A tiled threshold or a concealed profile fixes that.
- Grouting with a standard cement mix in the wet zone — it goes dark and picks up dirt within six months. In a shower, use only epoxy grout or a good cement grout with hydrophobic treatment.
What to prepare before the specialist arrives

- Choose the drain type — point (square) or linear (slot). The envelope is made specifically for a point drain.
- Buy the drain ahead of time — Viega Advantix or Geberit. The specialist needs the installation height and connection diameter.
- Pick the tiles and buy with a 15-20% extra allowance — envelope cutting creates more waste than standard laying.
- Check that the sewage pipe comes out at the right point and has the correct fall (minimum 2% toward the riser).
- The screed must already be done and dry (minimum 28 days for cement-sand mix).
- Make sure there is access to water and electricity in the work area.
- Clear out everything unnecessary from the bathroom — the job is dusty and wet.
- If the walls are not tiled yet — tell the specialist, because this changes the order of work.
- Prepare waterproofing and adhesive — or agree with the specialist which materials are needed.
- Take a photo of the pipe layout and send it before the visit.
- Give details about building access, lift availability (for carrying materials), and parking.
Case study: envelope in a new build in Bemowo
A client bought an apartment in a new building in Bemowo and wanted a walk-in shower with a Geberit point drain. The shower zone was 1.2 x 1.0 m, with 60×60 cm grey porcelain stoneware tiles. The first issue — the sewage pipe was not centred but shifted by 15 cm. We had to adjust the envelope layout — two triangles came out wider, two narrower. The slope screed was made from cement-sand mix using guides, with the gradient checked by laser level. Waterproofing was done with Mapei Mapelastic in two coats and Mapei Mapeband tape at the junctions. Every tile was marked separately — the standard template did not fit because of the offset drain. Cutting took nearly as much time as laying. We grouted with Mapei Kerapoxy epoxy grout matched to the tile colour. The whole job took two full days. We tested it with water — it runs to the trap in seconds, with no pooling. The client was happy: the floor looks clean, the joints are tidy, and the water drains straight away (compatible with Paradyż, Tubądzin, Cersanit and similar).
Frequently asked questions about tile envelopes
What is a tile envelope in a shower?
An envelope is made up of four triangular planes on the shower floor that meet at a central point drain. Each plane falls toward the drain, so water comes in from all sides and does not collect.
What slope is needed for an envelope?
At least 1% (1 cm drop per 1 metre). Best is 1.5-2%. A smaller fall causes water to sit; a bigger one makes standing uncomfortable and creates a visible tile lean.
Which tiles work best for an envelope?
The best choice is mesh-mounted mosaic (it follows the slope easily) or tiles up to 30×30 cm. Large format (60×60 and above) can also be used, but it needs more accuracy and experience. Always choose tiles with an anti-slip surface (R10-R11) for shower floors.
What is the difference between a point drain and a linear drain?
A point drain is a square grate in the middle of the floor — the envelope with 4 planes is built toward it. A linear drain is a long slot along one wall, so the slope goes in one direction only. The envelope is made specifically for point drains.
Is waterproofing needed under the envelope?
Yes, absolutely. Two coats of liquid membrane waterproofing (Mapei Mapelastic, Ceresit CR 166) with reinforcing tape at floor-wall junctions. Without waterproofing, water will get through to neighbours — and the repair bill will be much higher.
Can an envelope be made with large-format tiles?
Yes, but this is the hardest option. Where the four planes meet, large tiles can create “teeth” (edge misalignment). You need an experienced specialist who can calculate the layout accurately and cut on angles without chipping.
How long does envelope installation take?
From one to three days depending on the size, tile type, and complexity. Mosaic is quicker; large format takes more time. Waterproofing also needs drying time between coats (minimum 4-6 hours), and that affects the schedule too.
What adhesive should be used for a shower envelope?
Only flexible C2TE class adhesive — for example, Mapei Keraflex or Ceresit CM 17. Standard adhesive in a wet zone will not handle temperature changes and constant moisture; tiles will come loose within a year.
Which is better — epoxy or cement grout?
For showers, epoxy is the better option (Mapei Kerapoxy, Litokol Starlike). It does not absorb water, does not darken, and does not grow mould. Cement grout is cheaper but needs regular hydrophobic treatment and loses its look over time.
How do I order envelope installation in Warsaw?
Call or send us a message. Send a photo of the shower area, give the dimensions, drain type, and your selected tile. The specialist will check the scope, give an estimate, and arrange a visit — usually within 1-2 days.
Why trust envelope installation to a professional
A tile envelope is one of the hardest jobs in tile installation from a technical point of view. There is no margin for mistakes: the wrong slope, weak waterproofing, or poor cutting — and in six months you end up with puddles on the floor or a leak to the neighbours. We make envelopes regularly — in new builds and during bathroom renovations across Warsaw. We work with Viega and Geberit drains, Mapei and Ceresit waterproofing, and all tile types from mosaic to slabs. The specialist comes with a complete set of tools and cuts everything on site. If you are planning a walk-in shower — contact us for a free consultation. We usually come the same or next day.