A pane is cracked, the hardware has failed, cold air is coming in from under the frame, or you have simply decided to replace the glazing — and now you need it installed. At first glance it seems easy: remove the old window, put the new one in place, foam around it. But if the measurements are off, the frame is set crooked, or the foam joint is done carelessly, in six months you can end up with gaps, condensation and draughts. We fit uPVC and timber windows all over Warsaw: standard, roof, and non-standard sizes. If the old window is still in decent condition but lets air through, adjustment or resealing may solve it without a full replacement.
How much does window installation cost and what affects the price
The price is shaped by the window dimensions, the type of construction, and the state of the reveal. A standard two-leaf window in a panel block is one case. A large floor-to-ceiling balcony unit is another. A roof window in a pitched roof is a third, and the fixing method there is completely different.
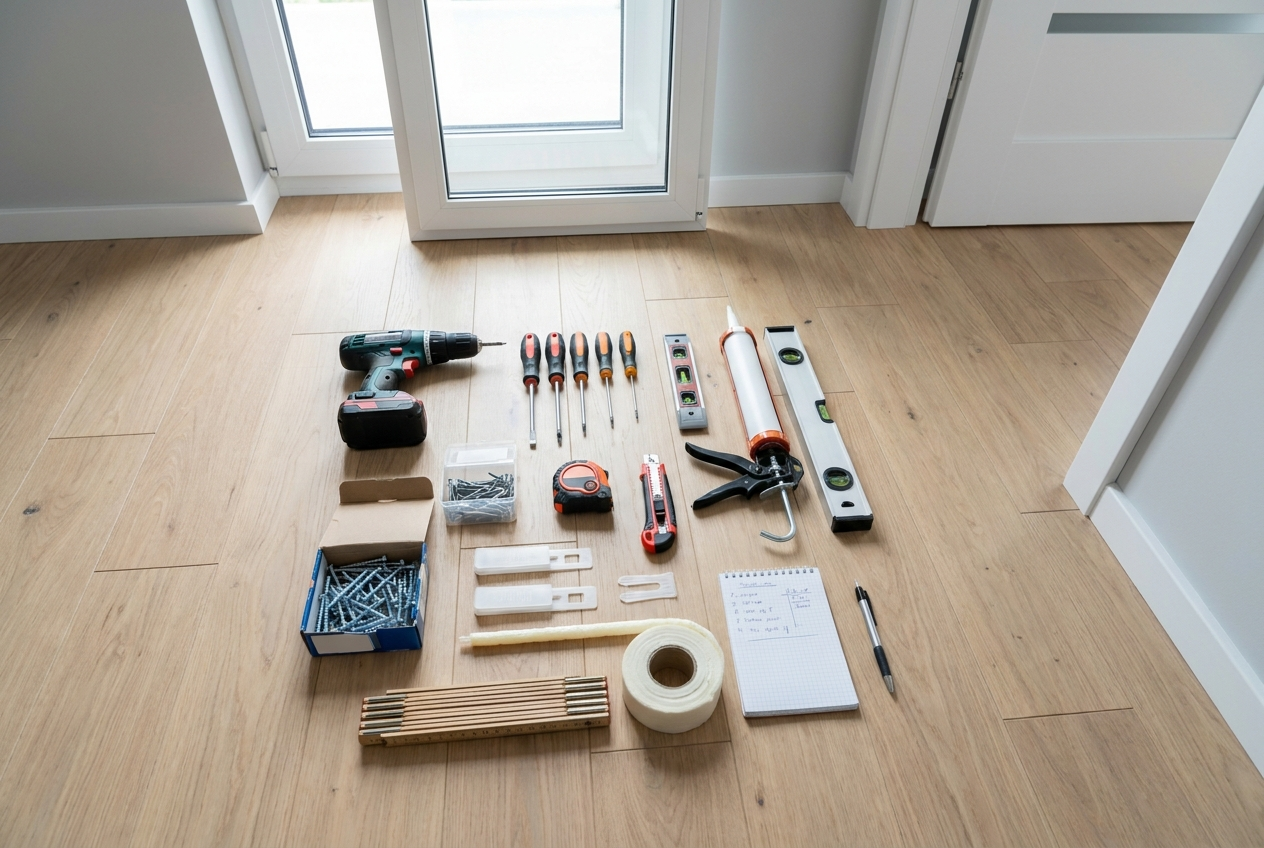
The labour price includes removing the old window (if there is one), installing the new one, levelling it, anchoring it, foaming the perimeter gap, and checking how it opens. The window itself is supplied by the client. A sill, reveals, and external flashing are priced separately. Waste disposal is extra. Current prices below (compatible with Porta, VOX, Erkado and similar).
| Service | min | max |
|---|---|---|
| Window installation | 300 zł | 700 zł |
| Window adjustment | 30 zł | 60 zł |
| Window sealing | 25 zł/mb | 40 zł/mb |
| Window repair | 150 zł | 400 zł |
Send a photo of the window along with the reveal dimensions — the technician will work out the exact price.
How window installation works: step by step
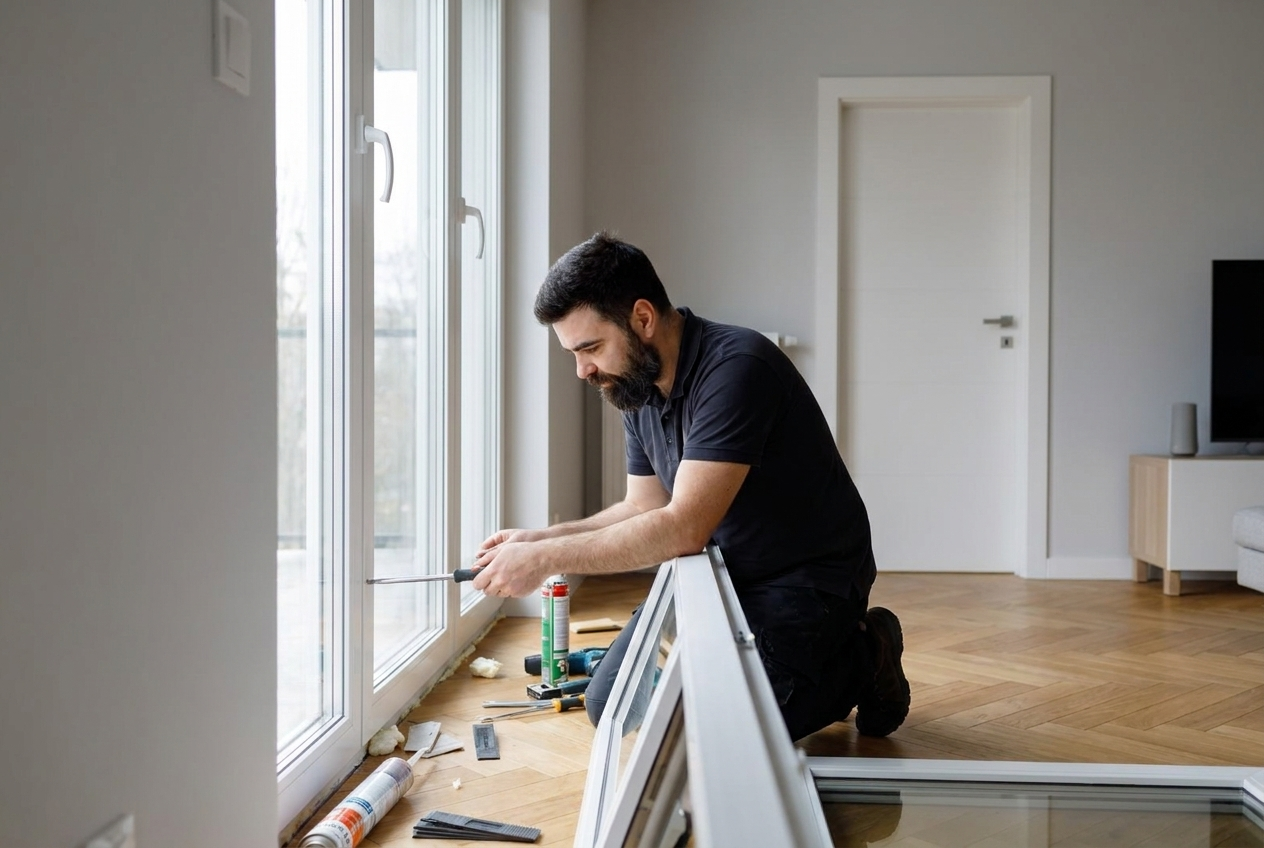
Installing a window is more than just placing it in the opening and filling the gap with foam. Each stage matters for airtightness, heat retention, and how long the unit will last. This is how the technician does the job:
- Measuring the reveal. The technician checks the width, height, and depth in several places. A 5 mm difference is acceptable, but if the variation is bigger the reveal has to be prepared first.
- Removing the old window. We remove the sashes, undo the fixings, cut through the old foam, and carefully take out the frame. If the reveals are breaking up, we cut back to a firm base.
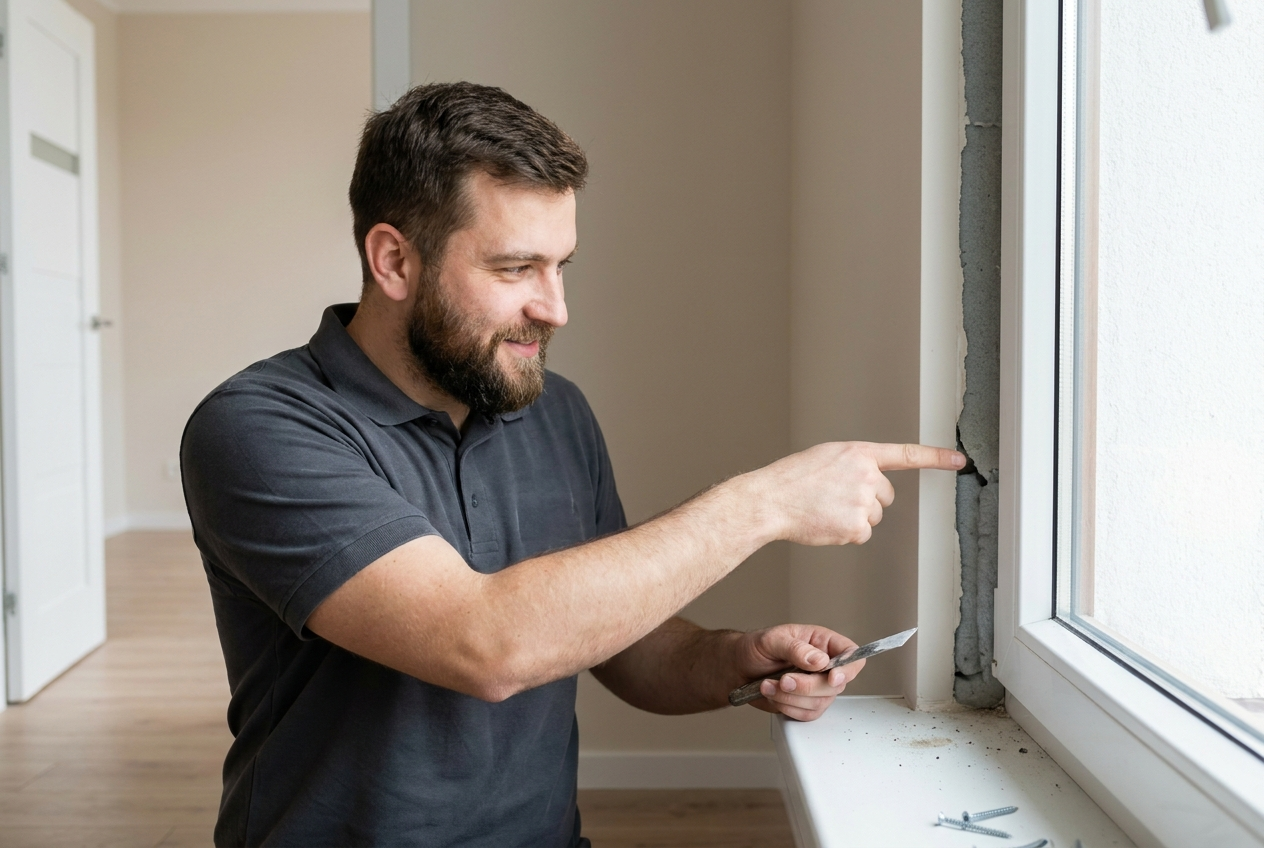
- Preparing the reveal. We remove leftover foam, plaster, and rubble. We make sure the surfaces are even. If the damage is serious, we level the opening with cement mortar and wait for it to harden.
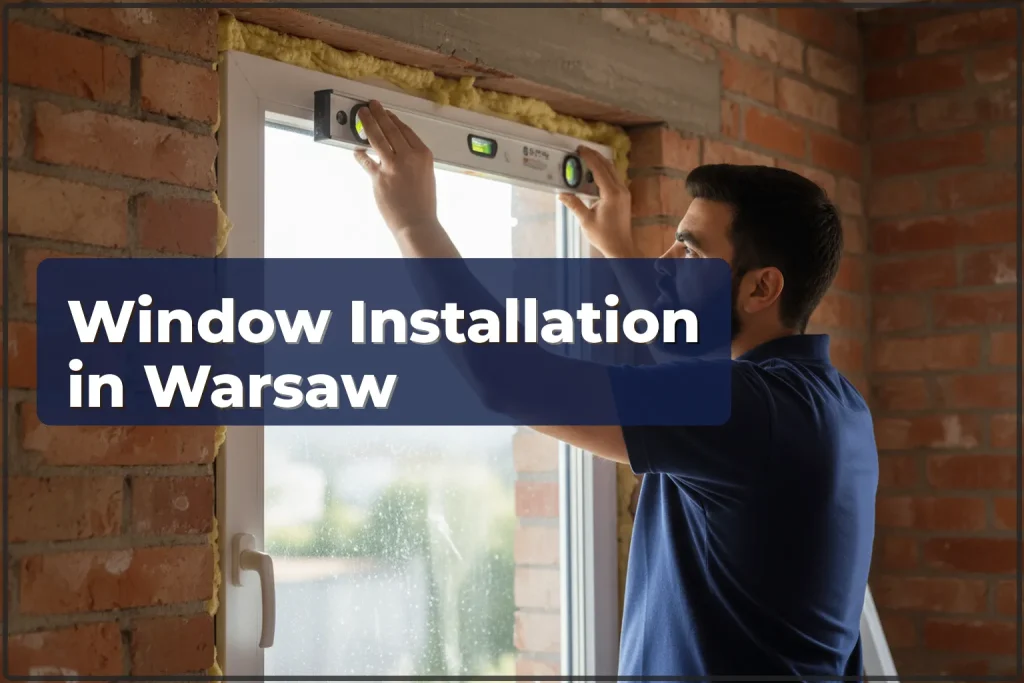
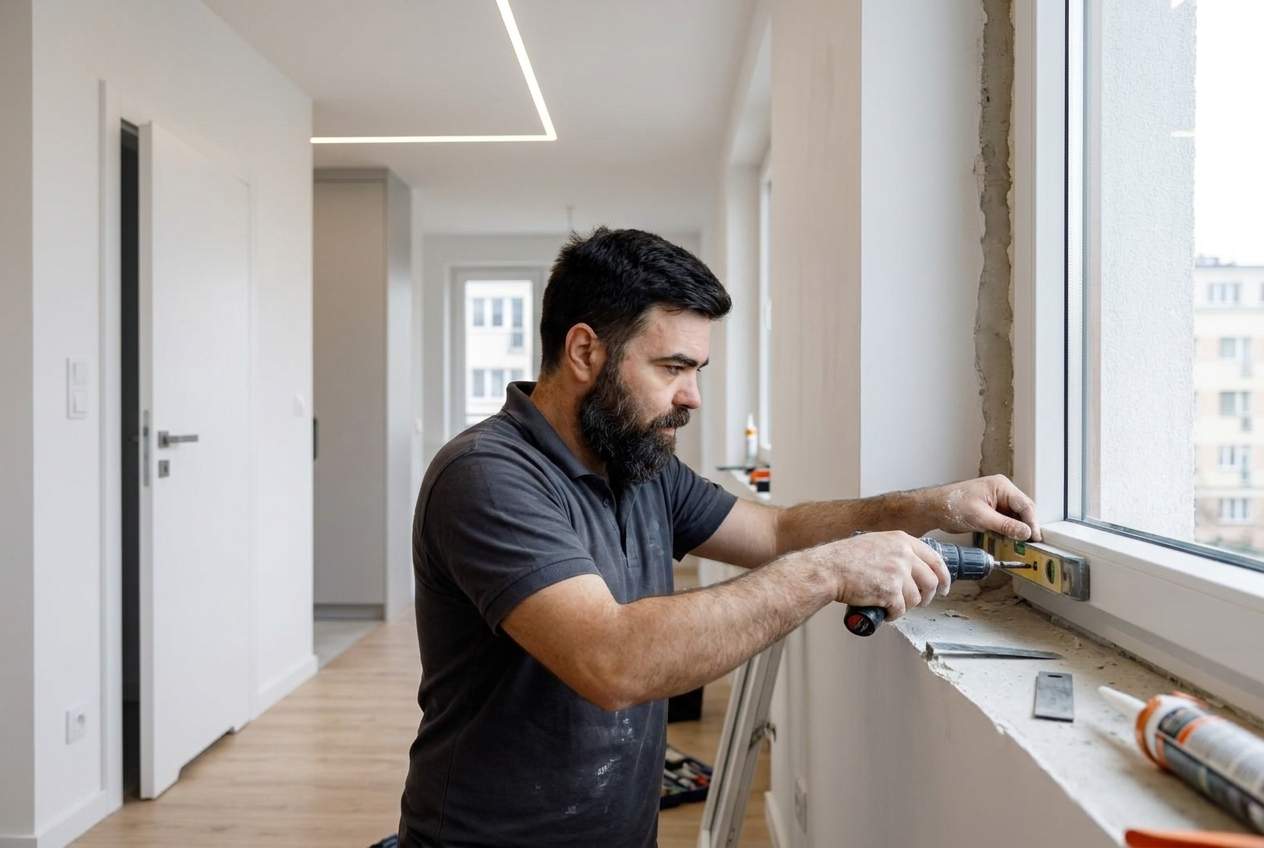
- Setting the frame. We place the frame on support packers and level it both horizontally and vertically. This is the key stage — if the frame sits crooked, the sashes will not shut properly. We secure it with frame anchors or through-bolts every 60–70 cm.
- Foaming. We fill the perimeter joint with expanding foam — evenly and without gaps. Once cured, the excess is trimmed off. Outside we use vapour-permeable tape; inside, a vapour barrier.
- Hanging the sashes and testing. We install the sashes and check that they open, close, and tilt freely. We inspect the seals all the way around and adjust the hardware.
- Final check. We test airtightness by passing a lighter along the seals — the flame should stay steady. We also confirm that the handle locks the sash in every position.
Common mistakes during window installation
Errors during window installation are costly. Fixing a bad installation is harder and more expensive than doing it properly from the start:
- Wrong measurements. The window was ordered 2 cm too wide — it will not go in. Or 3 cm too narrow — the joint is too large and the foam cannot fill it properly. Measure at least three points in both width and height.
- Frame not levelled. A 2–3 mm deviation per metre — and within six months the sash starts dropping under its own weight and no longer closes.
- Skimping on fixings. The frame is held only by foam, with no anchors. The first strong wind can move it. Frame anchors or through-bolts every 60–70 cm are a must.
- Poor foaming. Foam applied with voids or in an overly thick layer. The result — thermal bridges, condensation on the glass in winter, and mould on the reveals.
- No vapour barrier. The foam is left exposed on both sides. Outside it breaks down in UV; inside it takes in moisture. After a year or two the joint stops doing its job.
- Sill without a slope. Condensation collects on the sill and gets under the frame. A 2–3 degree slope towards the room is required.
- Forgetting the external flashing. Rainwater gets beneath the frame, ruining the foam and the wall. An external sill sealed properly is essential.
What to prepare before the technician arrives

Window installation makes a lot of dust — a bit of preparation saves both time and hassle:
- Move furniture at least 1.5 metres away from the window — dust and bits of plaster fly around during removal.
- Remove curtains, curtain rails, and blinds in advance.
- Protect the floors with sheeting — building dust gets into laminate and parquet.
- If the window is on an upper floor, let the neighbours below know beforehand (pieces can fall during removal).
- Make sure the new window has already been delivered and that its dimensions match the reveal. Check that everything is there: frame, sashes, hardware, seals.
- Ensure there is enough access to carry the window in — large units do not fit into lifts.
- Prepare access details: entry code and parking information — the technician comes with tools.
- Decide beforehand if you want reveals, a sill, and flashing — doing everything in one visit is cheaper.
- If there are children or pets in the flat, keep them away from the work area.
- In winter, remember that the opening will stay uncovered for 30–60 minutes. A heater in the next room is a sensible idea.
A real case: window replacement in a Praga-Poludnie flat
A client in Praga-Poludnie chose to replace three windows in a flat from the 1970s. The old timber frames had dried out, the seals had crumbled to dust, and the draughts were strong enough to shift the curtains. The reveals turned out to be uneven — up to 15 mm difference in width between the top and the bottom.
We first had to level the reveals with cement mortar and leave them for a day. On day two we installed all three windows: two standard double-leaf units and one balcony door-and-window set. Each frame was set with a laser level and anchored every 50 cm — the reveals were old, and the silicate brick walls crumble easily. We used professional winter-grade foam (it was +3 °C outside) and applied tapes inside and outside. The sills were fitted with the right slope, and the external flashings were sealed. The sashes were adjusted — all of them now close smoothly. The client felt the difference straight away: the flat became quiet and warm. The conclusion is simple: in older Warsaw buildings window installation takes more time because the reveals are uneven, but the end result is worth waiting for.
Frequently asked questions
Can windows be replaced in winter?
Yes, down to -10 °C. We use winter-grade expanding foam that sets in low temperatures. The opening stays exposed for 30–60 minutes — the flat does not lose heat to a critical level.
How long does replacing one window take?
A standard window — 2–3 hours including removal of the old one. Without removal (new build) — 1.5–2 hours. A balcony door set — 3–4 hours.
Do the reveals need finishing straight away?
Best done within a week. Exposed foam breaks down under UV. At minimum, cover the joint on the outside with tape.
Which is better: uPVC or timber?
uPVC is less expensive and needs no maintenance. Timber looks better and allows more breathability, but it needs repainting every 5–7 years. Thermal performance is about the same for comparable profiles.
Will the technician bring the window?
No, the client orders the window. We can assist with measurements and advise on choosing the profile and glazing unit.
What is included in the price and what is not?
Included: removal of the old window, fitting the new one, foaming, hardware adjustment. Not included: the window itself, sill, reveals, external flashing, waste removal.
Who does the work and what guarantees we offer

Your windows are fitted by tradespeople with hands-on experience in panel blocks, brick-built period buildings, and new developments across Warsaw. We work with uPVC and timber units in all sizes. We come fully equipped: rotary hammer, laser level, expanding foam, anchors, tapes. After fitting, the window will be airtight, the sashes will move smoothly, and the perimeter joint will be protected against moisture and UV. If you notice a draught caused by our installation, we will fix it free of charge. Call or message us — we usually reply within an hour.